DIY’ing my home.

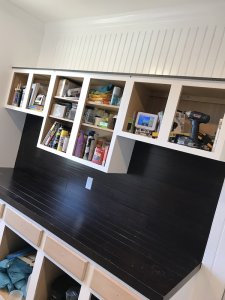
So the den is still incomplete ( no doors on the cabinets amongst other things ) but for a variety of logistical and practical reasons we’ve moved on to the laundry room while we’re (well Ron!) is making the doors for the den cupboards and we shop for a new couch and like that.

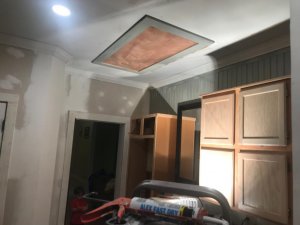
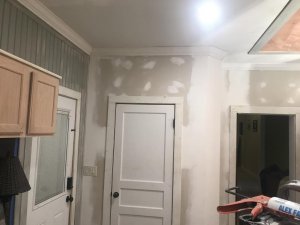
Here are the before pics. Hopeully we’ll have the after pics pretty soon. ;)
28F5A1FF-BBE3-4332-BB81-C9EE4208EB5D.jpgDD4D7396-C306-470A-AD6E-F3EAB80E2FD5.jpg
 

Last edited:
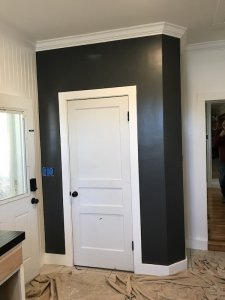
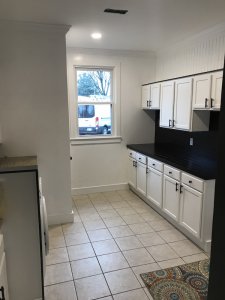
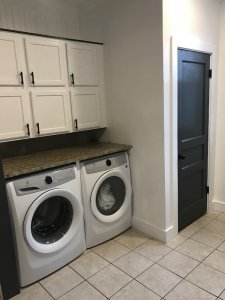
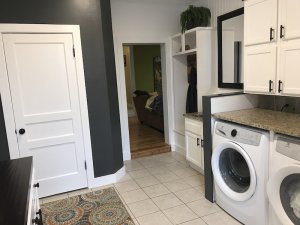
The laundry room is getting there! On the spur of the moment, we decided to throw some contrast onto the very white walls. The cabinet doors will also be white, once we get them back on. That's a lot of white. Ron built out this one section of the laundry room to create a coat closet. We used some leftover gray we had to paint that little area, and this is the result. I really like the way it looks. We still need to paint that door. It's one he salvaged from some job he did, and it's a bit scuffed and dinged.

IMG_0235.JPG

Note that we also added gray to the thin strip on the top of the cabinets. We did the same on the cabinets on the other side of the room. For a fun contrast, we'll paint just the utility room door on the opposite end of the room the same gray that's on the wall. It's slowly coming together.
IMG_0236.JPG
 

Here it is essentially finished!! There's still some tweaking to do (he has to put up the blinds, replace one of the tiles on the floor which is cracked, do some touchup painting, and add some shelving to one of the closets, stuff like that) but it's functional and useable.

I get to start decorating now woohoo!!!!
IMG_0303.JPG
IMG_0302.JPG
IMG_0305.JPG
 
Just beautiful. The colors you have chosen make everything so crisp and clean looking. You can add a splash of most any color and it would go well. Trim is always time consuming but I think it makes the room. You have both done a great job.
 
Just beautiful. The colors you have chosen make everything so crisp and clean looking. You can add a splash of most any color and it would go well. Trim is always time consuming but I think it makes the room. You have both done a great job.

Thanks Ruth!! I'm just tickled...it's the biggest and nicest laundry room I've ever had!!! We have some plants that I need to move in there...the light is really good! Plus I want to get some wall hangings and other stuff to so it doesn't look so sterile. I don't want it to be cluttered so there won't be much...I need the counter space! But just, as you suggested, some splashes of color.
 
I always thought that people who can do this type of work has a real talent. My dad was very good at carpentry, but I never acquired his ability for construction. I did put in hardwood floors last October-November, but even that was a struggle.

Working on cars, OTOH, come much easier for me. I was a gear head from the time I turned 14.

Tell your our husband he does good work.
 
I rarely peek into this area of the forum .. so nice to see what you and Ron have done to the house. It's so satisfying to be able to DIY. Beautiful work, and I know you will both enjoy it once it's all done.
 
Thanks Ruth!! I'm just tickled...it's the biggest and nicest laundry room I've ever had!!! We have some plants that I need to move in there...the light is really good! Plus I want to get some wall hangings and other stuff to so it doesn't look so sterile. I don't want it to be cluttered so there won't be much...I need the counter space! But just, as you suggested, some splashes of color.

Oh my, I missed the finished laundry room! Ronni it is great- so much room and storage. You can use some cabinet space for pantry items, I bet.

I love black and white . I like green accents with black and white, myself but yes- anything will look great.
 
We're going embark on the Master Bedroom renovation in two weeks! Well, Ron's already done some work. He had the floor reinforced, he's moved some furniture out of there and is living out of plastic bins right now, so that the only heavy stuff we have to move around the room as he renovates is the bed. This w/e is insanely busy, and we're going out of town on another weekend adventure next weekend, so we'll get rolling on the renovation after that. He's going to build the closet and the bathroom first (that's one whole side of the room) and then demolish the existing bathroom (it's on the other side of the room currently) and finish that out, including laying hardwood to match the rest of the floor.

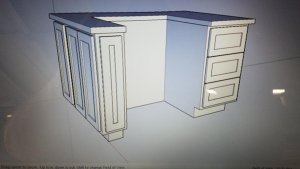
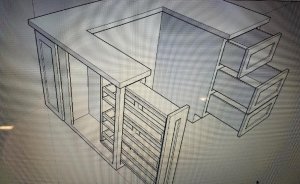
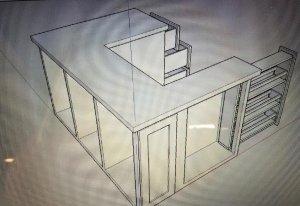
Meanwhile, he's also designing our new kitchen!!! I'm REALLY excited about that...it's going to be a dream kitchen with everything I've ever wanted in there! He roughed out some plans for the cooking island. He want to move the stove that is currently against one wall to the center of the room, surrounded by cutting board surface and custom slide out drawers and other shelving for pots and pans, utensils etc. Here are the plans he started with..they've since been tweaked some, but you get the general idea.

The cutout is where the stove will be. The countertop surrounding it is all cutting board surface, though the larger surface is on the right which is the size of a very large cutting board and where pretty much all the work will be done. The pull out drawers on the right hand side will be for the iron skillets and most used pots. The skinny drawers on the left are originally where we were going to put the spices. But I'd prefer to have them at eye level, and it just so happens that right behind where that island is going to be he's building floor to ceiling cupboards, one shelf of which he can design to display all the spices and other cooking oils and flavorings. Yes please! So those narrow drawers will likely become storage for cooking basics like salt and pepper and olive oil, and then utensils, pot holders etc. Perhaps two drawers instead of three? We're still tweaking the design.
IMG_0666.jpg

IMG_0668.jpg

That back section of the island will be more narrow shelving but with a lip so that pot lids can be stored upright and overlapping. That part of the design is still in progress, he's trying to determine the best way to add doors.
IMG_0667.jpg

Right now behind the island is the sink, kitchen cabinets etc. To the left of it is the eat-in part of the kitchen. In front of it, where the narrow shelves are, is just a long section of wall behind which is the living room. Eventually we're going to knock out that wall, creating a large family communal type area. Once the wall goes and it opens up the space, we'll remodel the island, to create a sort of backsplash to the stove and then a ledge jutting out that will become a breakfast bar, two or three barstools in front. That's a ways down the line yet, but it's the eventual, final plan when there's room.
 
OK, we're starting on the master bedroom/bathroom remodel!

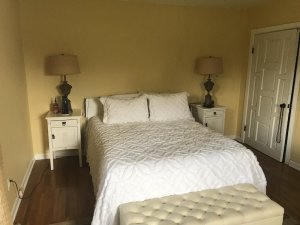
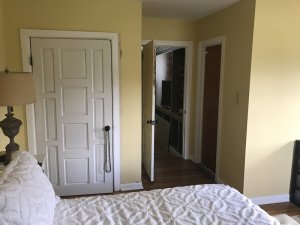
Here's the room after we moved some of the furniture out, but left the bed and nightstands before we moved it to the other side of the room. That door on the right in the first photo is the existing closet. You can see it again in the second photo, then the entrance to the room, and then the bathroom door. All that's being demolished. But first..........
IMG_0799.JPG

IMG_0795.JPG

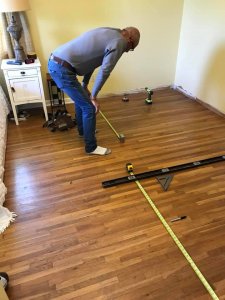
We had to move the last of the furniture out of the room except the bed, and then we slid the bed and nightstands to the other side of the room. With lots of floor space to work with, we then spent a couple of hours measuring and figuring out the proposed plan, and drawing it out on the floor, erasing several times as Ron worked through various problems with this or that design. We're working hard to maximize every inch of space so we get to have everything we want in the closet and bathroom. He chose to put pocket/sliding doors in rather than regular ones so that we don't have to accommodate room for the doors to open. Of course that means he had to solve the problem of having enough room inside the walls for the doors to not slide into each other lol!
I posted this pic because it seemed like every time I walked into the room, he was standing like this, in different parts of the room, staring at the floor! :lol: I started referring to it as his thinking position!
57116343_10161826630235387_5696023608350998528_n.jpg

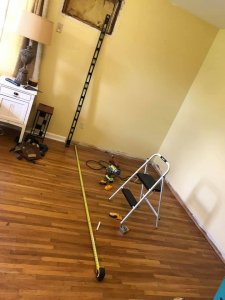
That hole in the wall you can see just above the level is where there used to be a wall air conditioner. He long ago finished it out, and it was a cute shelf where he'd put a pothos with the vines trailing down. Now though he'll just wallboard it in He's going to build the new closet and completely finish it first, because we need to move all of his clothes out of the existing closet so that he can demolish it and put the master bath there. We ordered or bought all the material last weekend, and this weekend he starts the build!
57044253_10161826630225387_893206545909678080_n.jpg
 
Ronni, that's a lot of work ahead but having things he way you both want is so worth it!

Will your new bathroom be a "wet room" style with a drain in the floor, or a traditional step into tub & shower?
 
Ronni, that's a lot of work ahead but having things he way you both want is so worth it!

Will your new bathroom be a "wet room" style with a drain in the floor, or a traditional step into tub & shower?

We REALLY wanted the wet room style. And that's originally what we were going to do. But as that involves knocking out a wall so that we have the several extra feet we need for the design, we reluctantly decided against it. It will take considerably more time, expense and cosmetic work on the exterior (matching the brick, cement work, possible foundation involvement) and we just decided it wasn't worth it. It will increase the value of the house only marginally, which is a consideration with all the renovations we're doing, should we at some point decide to sell. And will increase the renovation time which is also an immediate consideration. The longer the renos take, the longer before I can move in.

This remodel is being done so that there's enough closet space and bathroom space for all my "girly girl" stuff. :lol:

Then we were going to do a separate tub, and circular shower stall. Again, more room needed. So we've finally opted for the step in tub/shower for all the practical/logistical/financial reasons that made sense. Sometimes being pragmatic sucks!
 
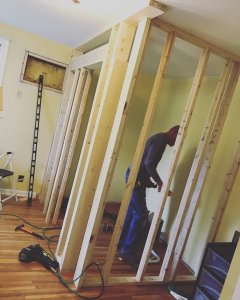
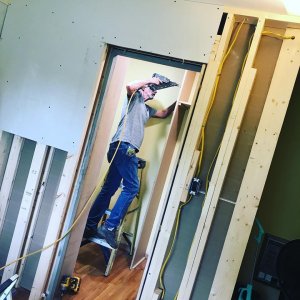
Framing is DONE for the closet!!!
57490323_10161855574395387_8991339649913847808_n.jpg
Over the course of the week, Ron will work on the sheetrock. He says that the framing is the most complex and cumbersome part and was very appreciate of my help, and the sheetrock is easy by comparison so by next weekend when I get back over there it should be all done!

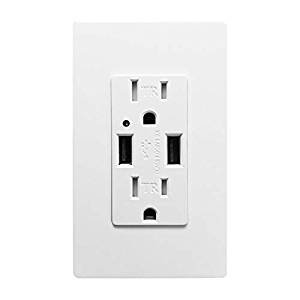
Hard to see but if you look close near the bottom left hand of the picture he also started the project of running some additional electrical. That's that hole in the wall you can just see. We need more outlets in the room since a couple ended up in the closet where they won't do much good. He also needs to run lights to the closet (a couple of can lights I think) and do the prep for running more lights to the bathroom when he gets to that point. One cool thing he did is to install these outlets with onboard usb chargers...the kind into which you can plug cell phone chargers directly so you don't need the additional wall plug.
Unknown.jpeg

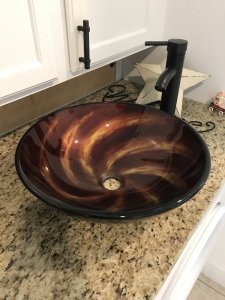
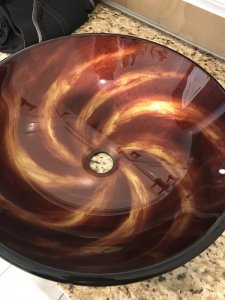
And finally, he found the perfect sink for our bathroom once he starts building it. I love his taste!! We wanted something different, just for fun! It's a vessel style sink, meaning that it stands above the counter (don't mean to insult anyone's intelligence..I didn't know what it was called when Ron first told me about it!)
IMG_1323.JPGIMG_1320.JPG

I just love the color/pattern, and it's given me a framework now for the accessories I need to start shopping for, both cosmetic and practical. I want to look for complimentary hardware for the drawer/cupboard pulls etc. plus things like shower curtain, soap dispenser etc.

Ron's also designing the cupboards and shelving etc. for the bathroom to maximize storage the small space. He even thought of little drawers under the wall cabinet/medicine chest to house my makeup. What a guy!!!
 
Everything is so beautiful Ronni, lots of hard work but well worth it and looks like lots of fun too! I love the sink pattern! :cool:
 
Lookit! All that bare framing is now an actual room! There are two built-ins...one for each of us....then a small section with just one high rod on which to hang my dresses and gowns etc., double closet rods with a total 17 feet of hanging space, and extra deep shelves over the top rod. It's a small space, but we've designed it and he's built it to take advantage of every single inch!" As it stands right now, it gives me several feet more hanging space than I currently have and WAY more shelf space between the built ins and the shelves over the top rod! He also installed two can lights so that it's brightly lit in there but they're on a dimmer just in case. He put a vent in there too, because one wall of the closet sits on an outside wall so it will get a bit chilly in there in the winter time. Sliding door so that the door swing doesn't take up any needed space.

59639054_10161908853190387_8560845044792164352_n.jpg


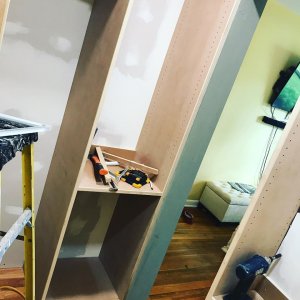
This is inside the closet looking out. Middle of the pic is the beginning of one of the built ins. That one will have both shelves and several drawers. That upright to the right is the wall of the second one, which will just be shelves, at my request. Floor to ceiling both of them, to allow for maximum storage....out of season things on the high shelves, daily use stuff at a more comfortable height. We bought a very lightweight two step step stool to keep in the closet for ease of access to the high shelving.
59456340_10161908853425387_6094208239656763392_n.jpg
 
I love seeing all the renovations in the works!
The stove area is great. I wouldn't put my dried herbs and spices next to a hot stove, but that's just me.

The bedroom and en suite will be fabulous.
 
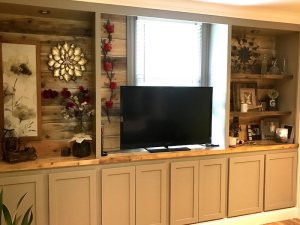
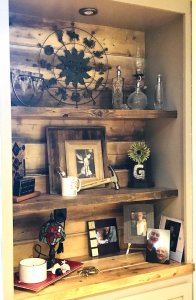
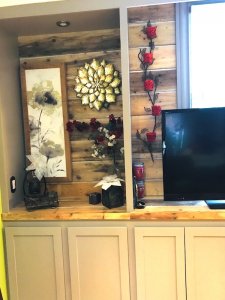
I realized I never posted pictures of the finished den built ins! I'm really happy with how it ended up. Those low cupboards have been a godsend as I've been moving stuff over. Until the master bath is finished, they hold the overflow of bathroom things that I currently have no place for. Still need some kind of valance over the window, or window treatment of some kind because I feel like it looks unfinished right now. Suggestions welcome. And the shelf decorations are still somewhat a work in progress, but nonetheless I love the way it's come together. My man sure is handy!!!

IMG_2303.jpg

IMG_2300 2.jpg

IMG_2302 2.jpg
 
Really like the bathroom sink! Love the swirly pattern.
Very different, never seen anything quite like that in a bathroom. Would take a little getting used to but I wouldn't mind having a bathroom like that. :)
 
The den looks great, Ronni. I don't know how I'd treat the window since there's a tv in front of it aside from a simple valance as you've thought of.

I'd put my books on the shelves to the right, plus a few photos. I'm attracted to those glass items on the top shelf. Maybe with the light is on they stand out more.

You guys are doing a great job and I'm really enjoying watching it come together! :)
 
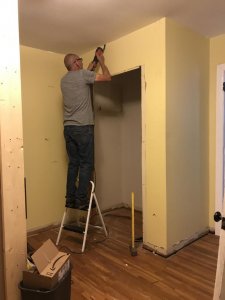
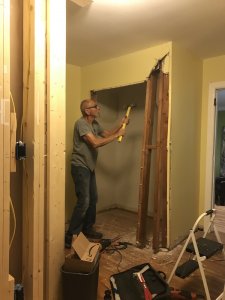
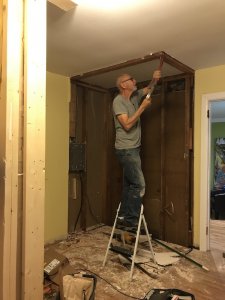
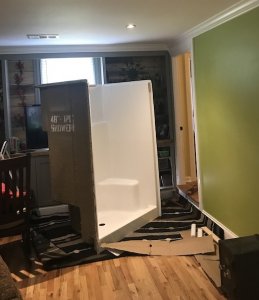
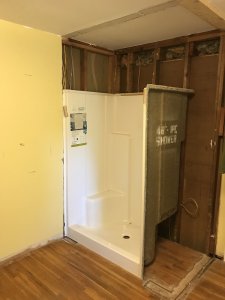
We’ve been busting our butts most of the weekend in between various other commitments (granddaughters dance/ballet recital for one!! So cute, I’ll post later about that) but finally finished the demolition of the old closet and got the mess cleaned up enough to get the shower stall put in place. A lot of work before we can actually install it, but it’s finally in the room. And lemme tell you that was a feat!!

IMG_2454.jpg

IMG_2464.JPG
IMG_2469.JPG

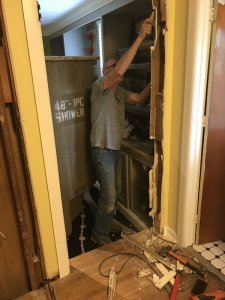
I thought it was impossible to get a 34” shower through a 32” door opening, but my sweet man proved me wrong. That was the shower stall he wanted, and by God that was the shower stall he was going to have!! So he just ripped out part of the door! He is definitely solution oriented...not a defeatist at all! :lol:


IMG_2507.JPG
IMG_2511.JPG
 
And here, finally, is the shower, in place. That was the goal for the w/e and we accomplished it!
IMG_2541.JPG


We spent the rest of the time in the garden, I did some pots and he roto-tilled a section of garden by the garage in preparation to plant a couple of bushes. It was a very productive weekend!
 
I haven't looked at this thread since the early days... wow!! What a brilliant achievement , incredible actually!!..

I think you're going to have a wonderful life together there...
 
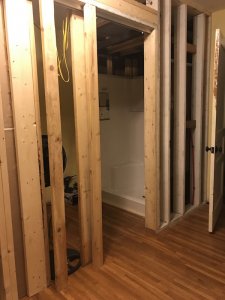
Master bath is slowly coming along. We were stalled for about 10 days waiting for the plumber to come in and run some lines. Finally got that taken care of yesterday. Today Ron will be putting up sheet rock to start creating actual walls instead of just the framing, running some electrical, and creating a drop ceiling for over the shower.

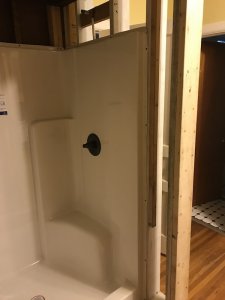
Shower entrance. It will be a sliding door like in the closet, to save space.
IMG_2713.JPG

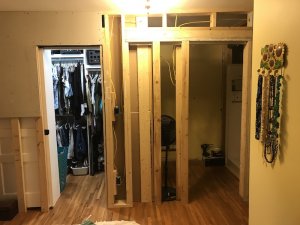
Closet on left, bathroom on right. The wall where the jewelry is hanging is the existing bathroom which will be demolished once the new bathroom is done.
IMG_2714.JPG

Impossible to get a pic of the shower stall because I can't get far enough away lol. But you get the idea.
IMG_2715.JPG


Back
Top